Rooting Vietnamese White Dragon Fruit Cuttings
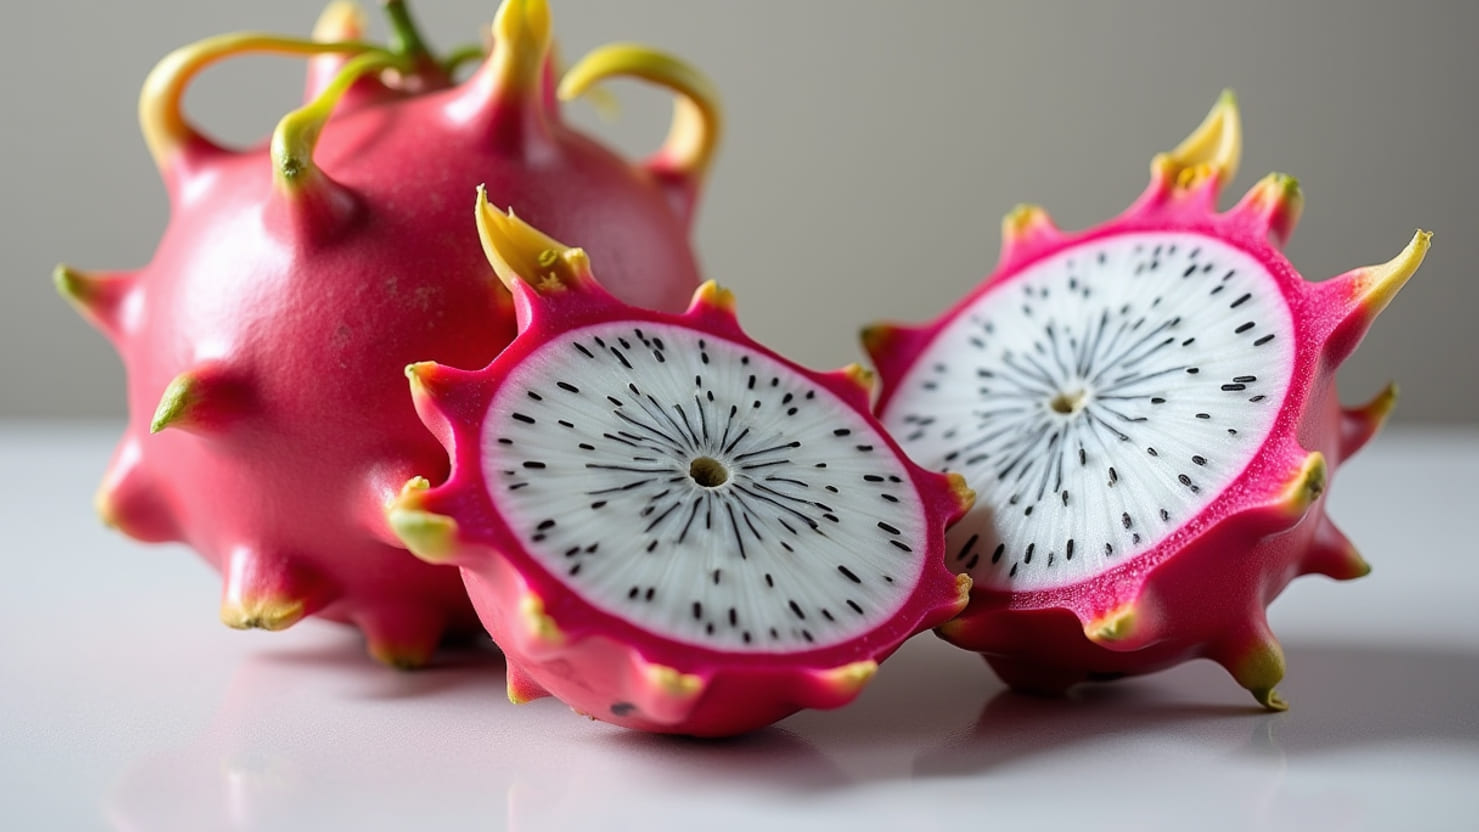
Root your Vietnamese white dragon fruit cutting by curing the slanted basal cut in a dry, shady spot before planting. Set the segment upright in a fast-draining mix. Water sparingly to prevent rot, as these stems are highly sensitive to waterlogging. Expect visible roots in a few weeks and a robust, transplant-ready system in 4 to 6 months. While Florida extension data shows fruit can appear as early as 6 to 9 months on long cuttings, this method ensures a genetic clone of the mother plant. For details on the fruit’s specific traits, see our variety spotlight.
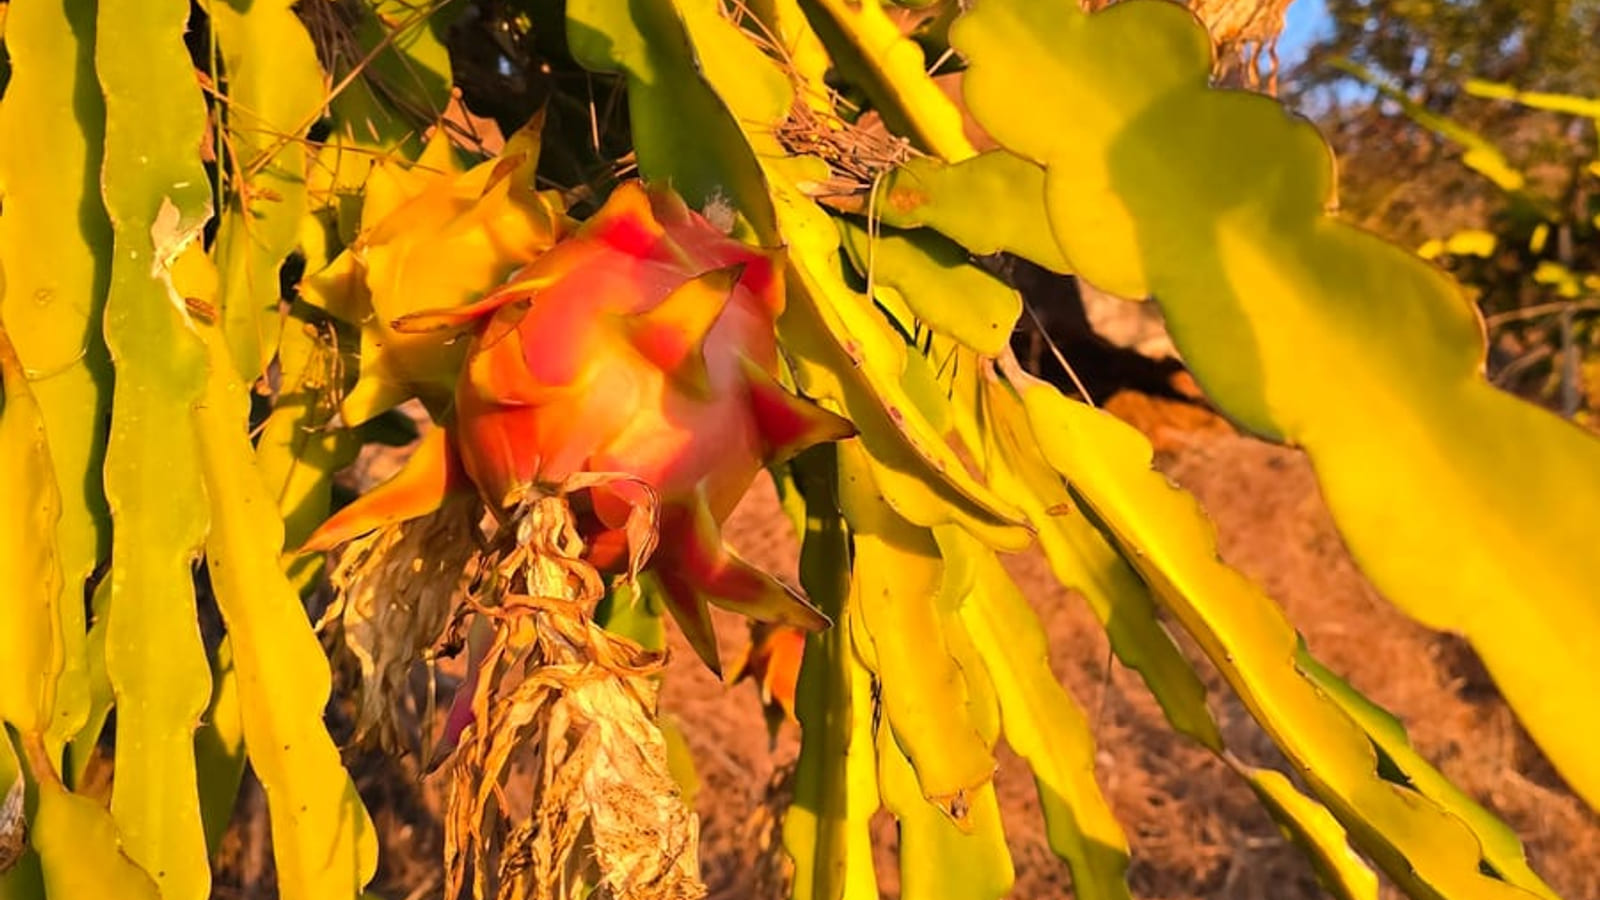
Why a Cutting and Not a Seed
You might wonder why we do not simply plant a seed from the fruit you just ate. The answer is genetics. Dragon fruit grown from seed is genetically variable, meaning the offspring will not look or taste exactly like the parent. Worse, a seedling can take up to 7 years to produce its first crop.[1] A stem cutting, by contrast, is a clone. It carries the exact DNA of the mother plant. This ensures that the fruit you harvest matches the variety you bought, down to the skin color and flesh texture.
Every major planting in the literature relies on cuttings because they deliver fruit production in under a year and bear uniformly across the block.[2] Waiting seven years for a seedling to potentially produce mediocre fruit is not a viable strategy for a home gardener or a farm. Propagation by cutting is the widespread method for a reason: it is fast, predictable, and efficient.
Source matters. Because cuttings are clones, they also transmit pathogens. Informal exchange of uncertified cuttings is a known vector for spreading disease between farms and vine blocks.[2] Always buy from a nursery that screens its mother plants and disinfects tools between cuts. A cheap cutting from an unknown source can introduce fungal issues that stall your garden for years. See our blog/vietnamese white variety spotlight for more on what to expect from a clean clone.
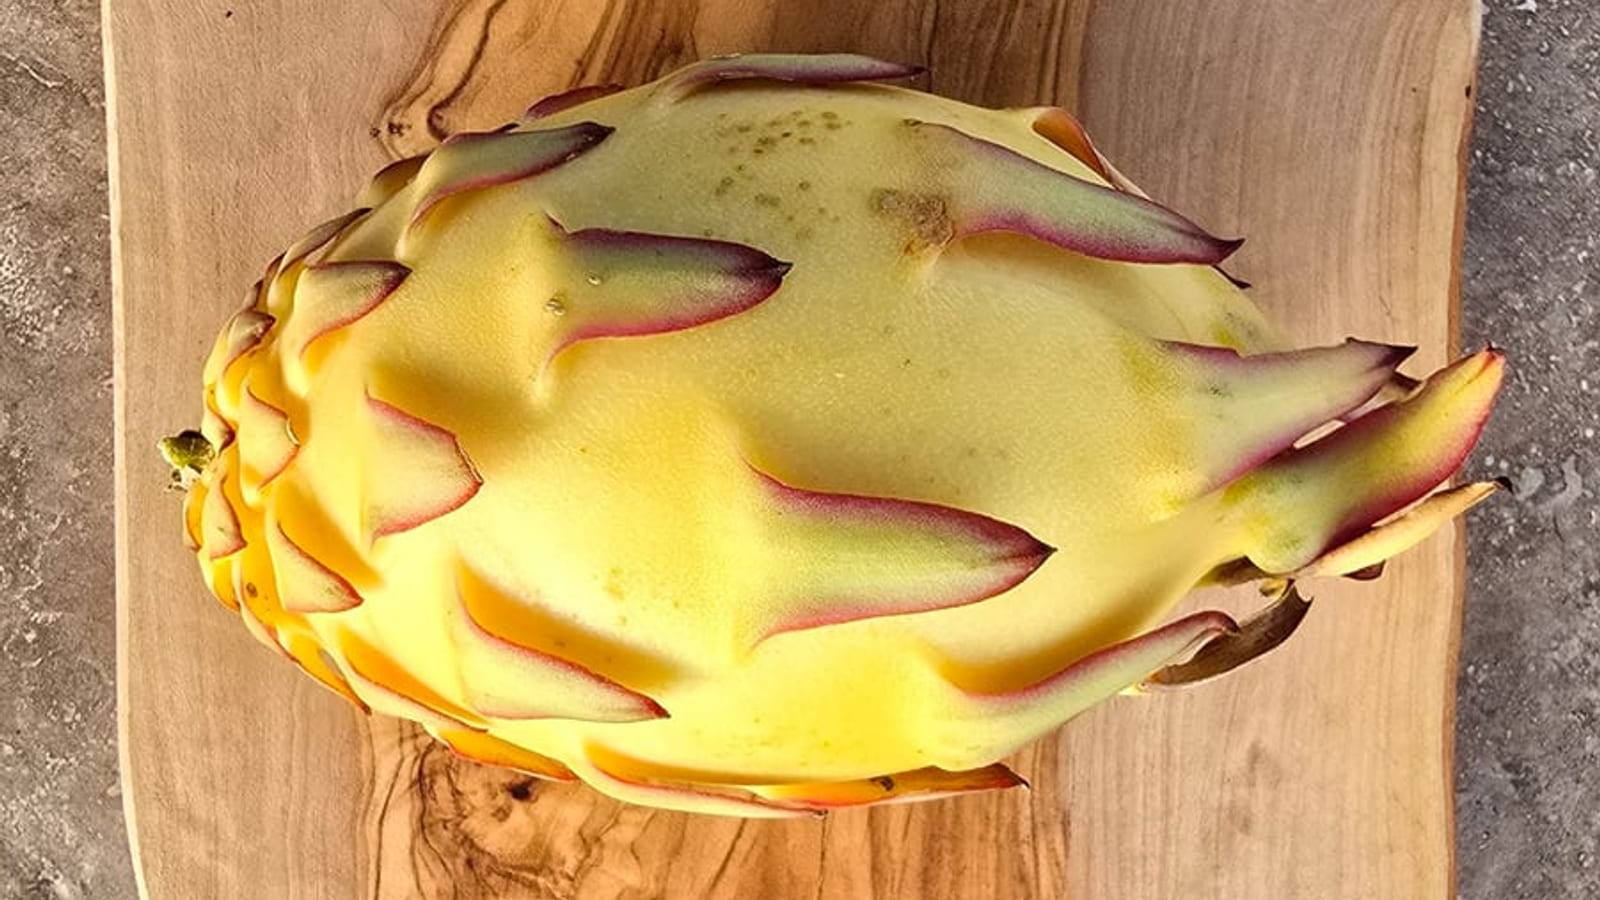
Vietnamese White Cutting at a Glance
Here is the quick reference for your new clone. Keep this table handy while you work.
| Spec | Value |
|---|---|
| Cutting length | 6 to 15 inches[1] |
| Cure time | 7 to 8 days[1] |
| Planting depth | 1 to 2 inches[1] |
| Orientation | Upright, basal end down[2] |
| Medium | Fast-draining sand or perlite mix[2] |
| Light while rooting | ~50% shade[2] |
| Temperature range | 65 to 77 F |
| Cold limit | 31 F |
| First roots | Weeks to months depending on season |
| Pot establishment | 4 to 6 months[1] |
| First fruit | 6 to 9 months[1] |
| Trellis load | Several hundred pounds[1] |
| Fertiliser start | 1 month after planting[1] |
Picking Up the Cutting: What a Good Piece Looks Like
Not all stems are created equal. If you are selecting a piece from a mother plant or evaluating a cutting offered by a seller, look for maturity. Basal cladodes, the segments closest to the ground, are darker green and structurally tougher than the pale, light-green shoots at the top of the vine. These older segments root more reliably because they hold a better balance of auxins and stored reserves. Pieces less than a year old often struggle to establish, as they lack the carbohydrate energy needed to push out roots before they exhaust themselves.
Where you take the cut matters as much as what you take. The most reliable rooting occurs when the cutting is severed at the cladode insertion, the point where the woody tissue joins the mother plant. Cutting into the succulent blade itself yields less consistent results. A clean break at the joint preserves the natural vascular connection and minimizes damage to the living tissue.
Size is your next filter. While the general range for a planting unit is 6 to 15 inches, the sweet spot for vigorous establishment is 15 to 25 cm (6 to 10 inches). Longer cuttings carry a higher carbon-to-nitrogen ratio and more carbohydrate reserves. This extra energy translates directly into root mass. Research on Selenicereus undatus shows that longer segments produce root systems that are measurably longer, more voluminous, and heavier than those from shorter pieces. A larger root system means the plant reaches the trellis support sooner and withstands transplant shock better.
| Feature | Good Cutting | Poor Cutting |
|---|---|---|
| Color | Dark green, mature | Pale green, young |
| Age | Over one year old | Under one year old |
| Length | 15-25 cm (6-10 in) | Short segments |
| Texture | Tough, rigid | Soft, fleshy |
Finally, inspect the surface for history. Look for sunburn, which appears as bleached or scorched patches, and check for prior staking damage. Wounded tissue is an open door for field rot. While dragonfruit can recover from light injury, a cutting with significant scars or soft spots is a liability. Fungal pathogens like Fusarium and Phytophthora enter easily through damaged areas, potentially stalling your new plant before it even gets a chance to root. A clean, unblemished surface is the best insurance policy for your clone.
Step 1: Slant the Cut and Seal the Wound
Before you set the cutting aside to cure, you need to make sure you know which end is up. A dragon fruit cladode can look symmetrical from a distance, but orientation matters for rooting. Take a clean, sharp knife and make a single slanted cut across the base of the stem. This angled surface serves as a permanent physical marker. When you are ready to plant, you simply look for the flat top and the slanted bottom. There is no guessing, and no risk of burying the apical end in the soil.
The fresh wound is an open door for pathogens. Dragon fruit stems are susceptible to fungal and bacterial infections, particularly from organisms like Phytophthora and Fusarium, which thrive in moist conditions and can enter through damaged tissue[2]. To protect the cutting, you must seal the cut immediately after making it. The University of Florida IFAS extension recommends treating new cuttings with a fungicide before curing[3].
If you prefer a non-chemical approach, peer-reviewed literature supports the use of Bordeaux paste or powdered cinnamon (Cinnamomum verum) as effective wound dressings[2]. Both substances act as fungistatic and bacteriostatic agents, meaning they inhibit the growth of fungi and bacteria without necessarily killing them outright. Dusting the slanted cut generously with cinnamon powder creates a dry, protective barrier that discourages rot while the callus forms. Bordeaux paste, a mixture of copper sulfate and lime, offers a more durable seal for growers who want a traditional agricultural standard.
Why seal the wound? A 2020 study on basal rot caused by Fusarium oxysporum showed that symptoms appeared significantly faster in wounded cuttings (12 days) compared to unwounded ones (22 days)[6]. While the pathogen can eventually enter undamaged tissue, a fresh, unsealed cut accelerates infection. Sealing buys you time for the natural callus to form.
Once the wound is treated, you are ready to move to the curing phase. The goal here is not to dry the stem out completely, but to allow the cut surface to heal and form a protective layer. This preparation sets the stage for successful rooting, ensuring that when you finally plant the cutting, it is protected from the soil-borne threats that cause stem and root rot.
Step 2: Cure 7 to 8 Days, Out of Sun
Once you have made your slanted cut and applied a fungicide, do not rush to the potting bench. The University of Florida IFAS protocol calls for a drying period of 7 to 8 days in a dry, shady location before the cutting touches soil.[1] This step seals the vascular system against pathogens, rather than simply drying the plant.
Consider the biology of basal rot. A study in Buenos Aires documented Fusarium oxysporum causing rot that started at the soil line and moved upward, reaching 30% incidence in some nurseries.[6] The critical finding was in the timing. When researchers inoculated the base of a wounded cutting, symptoms appeared in just 12 days. When they inoculated an unwounded cutting, it took 22 days for symptoms to show.[6] The pathogen can enter undamaged tissue, but an open wound gives it a running start.
Planting a fresh, wet cut into damp media is an invitation to disaster. The exposed vascular tissue is a direct conduit for Fusarium, Phytophthora, and bacterial soft rots caused by Xanthomonas and Erwinia.[2] By curing the cutting, you allow the wound to callus over. This dry, corky layer acts as a physical barrier, slowing the pathogen’s advance and giving the plant time to initiate roots before the rot can compromise the base.
Do not skip the cure. A cutting planted immediately after cutting is highly susceptible to basal rot. The 7 to 8 day window is the highest-leverage step in the entire propagation process.
Place the cutting upright in a spot with good air circulation and no direct sunlight. A garage shelf, a covered porch, or a shaded corner of the greenhouse works well. The goal is to let the cut end dry and harden. If you live in a very humid climate, you may need to extend this period slightly to ensure the callus is fully formed. If you live in a dry climate, like parts of California, the cut may seal faster, but sticking to the 7 to 8 day guideline is a safe bet to ensure the tissue is stable.
While the cutting cures, resist the urge to water it. It does not need moisture yet. It needs air. The stored carbohydrates in the cladode will sustain the plant during this period. Once the cut end is dry and callused, you are ready to move to the next stage. If you are interested in the specific growth habits of this variety, check our blog/vietnamese white spotlight for more details on its vigor and fruiting timeline.
Step 3: Rooting Hormone, Optional but Measurable
Your cured cutting can root on its own. Dragon fruit stems are vigorous and will often push roots without chemical help. However, applying a rooting hormone after curing and before planting changes the speed and quality of that root system. It is not a requirement for survival, but it is a tool for building a stronger foundation faster.
Recent research highlights just how effective this can be. A 2026 screening by Hainan University tested 14 different plant growth regulators on dragon fruit cuttings. The study found that naphthaleneacetic acid (NAA), indole-3-acetic acid (IAA), and potassium indole-3-butyrate (K-IBA) each achieved 100% rooting success. These treated cuttings showed significantly better root morphology than those placed in plain water.[3]
The specific type of hormone you choose affects the root structure. The same Hainan study noted that 400 mg/L NAA produced the best combination of overall root growth and root thickness. If you want longer roots, 125 mg/L K-IBA was the standout performer, extending average root length by 760% compared to untreated controls. These results held up in soil-culture pot trials, not just in a lab setting, which means they are relevant to your home nursery setup.[3]
Practical Application
Do not store treated cuttings. Dip the basal end in your chosen hormone solution and strike it into the potting mix within the hour. Delaying planting after treatment can reduce effectiveness or introduce rot risks.
Other trials support the value of optimized propagation. A 2026 study from Peru on three Hylocereus species found that the right inducer and substrate combination led to 100% cutting viability. In that trial, the best treatments resulted in first shoot emission at just 21.53 days. These plants also developed up to 5.30 roots per plant and achieved 68.67 cm of shoot growth. While genotype was the dominant factor in the results, the interaction between substrate and treatment was critical for that rapid establishment.[4]
For the home grower, this data suggests that while you can skip the hormone, using it gives you a measurable head start. A thicker, longer root system helps the plant establish more quickly in the pot, reducing the time it spends in the vulnerable establishment phase. If you choose to use a hormone, follow the label instructions for concentration carefully. Too much can burn the tissue, while too little offers no benefit.
Step 4: Pot It, Right End Down, 1 to 2 Inches Deep
Take your cured cutting and place it into a pot filled with a mineral-heavy mix. Think coarse sand or perlite blended with a small amount of standard potting soil. The goal is open structure. Organic matter feeds the plant later, but right now you need drainage. A peat block holds too much water and invites rot before roots can form. Position the cutting so the basal end, the one you cut and sealed, goes into the media. Bury it no deeper than 2 inches (5 cm). If you bury it too deep, the stem suffocates. If you leave it too shallow, it wobbles and breaks the fragile new root tips. The literature supports a shallow strike in well-drained sand or perlite substrates to maximize success rates.[2]
Light management during this phase is critical for survival. Place the pot in a spot with about 50% shade. This matches extension advice for providing 30% shade over the first few months, but slightly deeper shade helps the unrooted cutting conserve moisture while it establishes. The stem is still relying on stored energy, not photosynthesis, to push out roots. Direct sun will scorch the cladode before the root system can support it. Keep the media moist but never soggy. The plant is extremely sensitive to waterlogging, which triggers fungal issues like Phytophthora.[2]
Stake it now. Dragon fruit is a hemi-epiphytic climber. It relies on aerial roots to hold itself up, but those roots need time to lignify and gain tensile strength. Until then, the vine is weak. Tie the cutting loosely to a stake. This prevents the heavy top from snapping the fresh roots if the pot is bumped or if wind catches the stem.
Once you have potted the cutting, look at the top of the stem. You will likely see multiple small shoots emerging. Rub these out. Keep only the single most upright apical shoot. This directs all the plant’s energy into vertical growth, pushing the vine toward the trellis faster. Lateral branches now create a bushy, weak structure that is hard to train later. A single strong leader is what you want.
| Component | Specification |
|---|---|
| Orientation | Basal end down, apical end up |
| Depth | Max 2 inches (5 cm) |
| Media | Sand or perlite dominant; free-draining |
| Light | ~50% shade while rooting |
| Shoots | Keep one upright apical; remove laterals |
| Support | Loose tie to a stake |
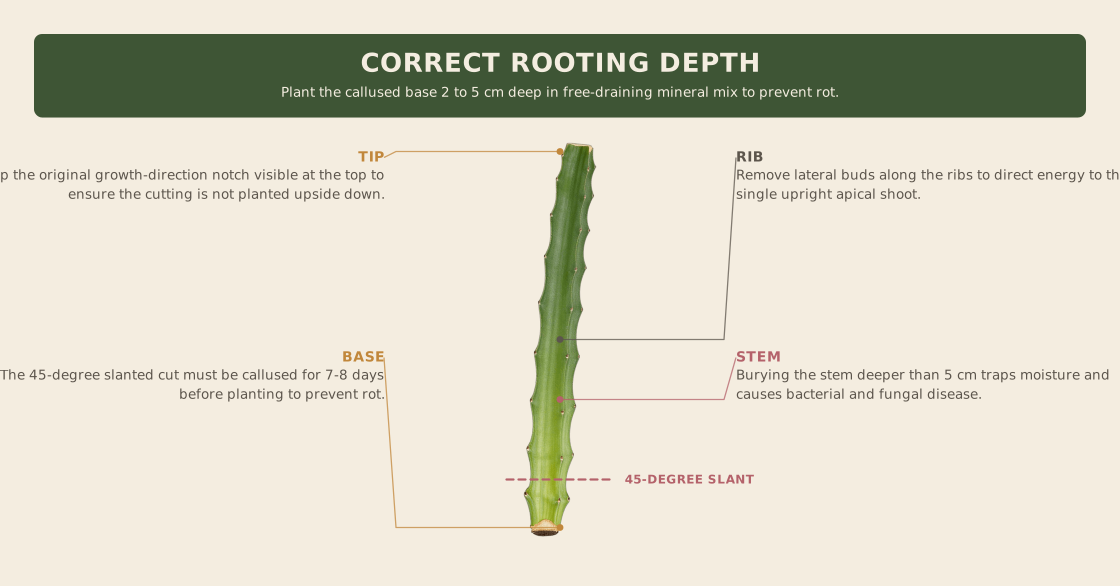
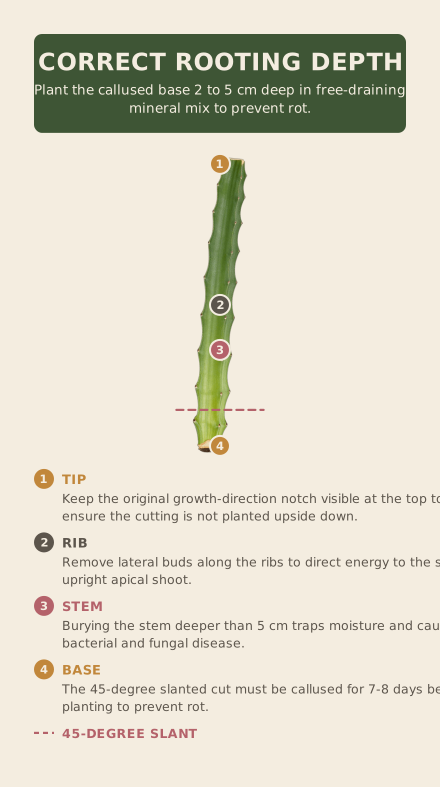
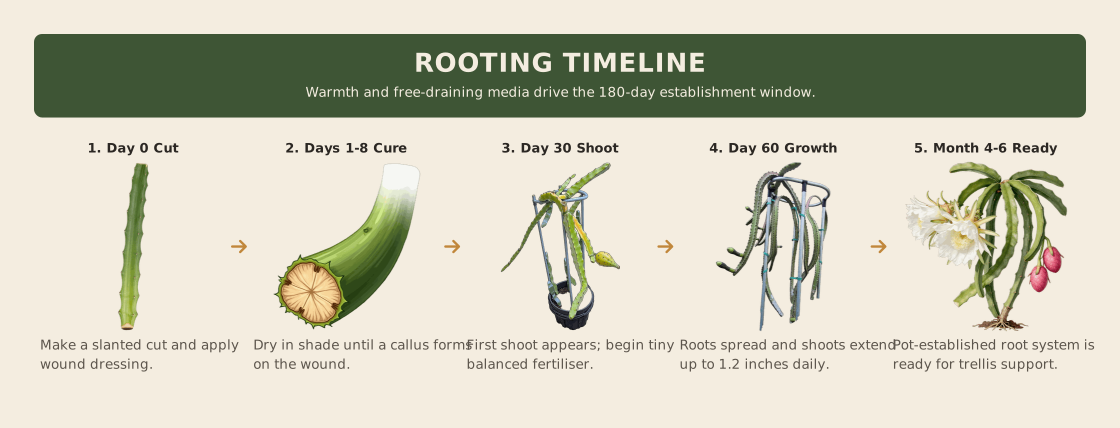
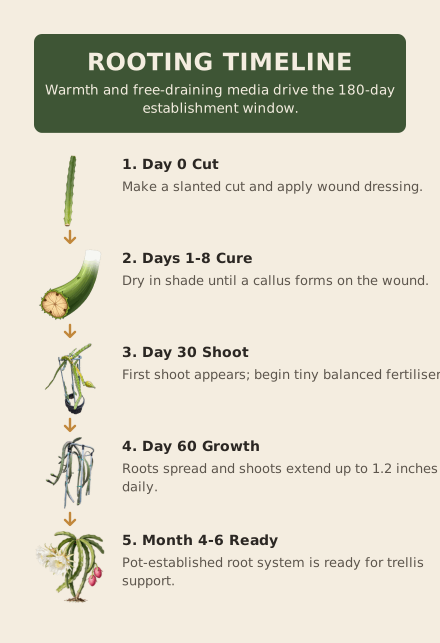
DIAGRAM: Timeline of the first 180 days
Watch the clock from the moment the cutting hits the soil. The first few weeks are invisible work. The plant is not growing up; it is growing down. Here is what happens below the surface.
| Day | Below Ground | Above Ground |
|---|---|---|
| 0 | Callus formation begins at the slanted cut. The wound seals itself. | Stem looks unchanged. No new growth yet. |
| 7-8 | Callus hardens. Root primordia (tiny root tips) start to differentiate from the callus tissue. | Stem may wrinkle slightly as it uses stored water. This is normal. |
| Weeks to months | First visible roots emerge. They are thin, white, and fragile. They seek moisture but avoid saturation. | A small green nub may appear at the top. This is the first shoot. |
| Weeks to months | Roots branch out. The system is still shallow and limited to the immediate planting zone. | Shoot extension begins. Growth is slow but steady. |
| Weeks to months | Root mass expands significantly. The plant can now pull more water and nutrients from the pot. | Shoot grows faster. Lateral buds may start to swell. |
| 90-180 | Root system fills the pot. It is robust enough to support transplanting to the ground or a larger container. | Multiple shoots develop. The plant looks like a miniature version of the mother vine. |
Why the delay? Dragon fruit is a CAM plant. It conserves water by closing stomata during the day. This metabolic strategy means initial growth is energy-intensive and slow. The plant prioritizes root establishment over shoot expansion in the first month.
By day 30, you should see the first signs of life above the soil. If the stem is still firm and green, it is working. If it turns black or mushy at the base, check for rot. A healthy cutting will push out roots before it pushes out leaves. This is a survival mechanism. The roots must be ready to supply water before the leaves demand it.
At the 60-day mark, the plant shifts gears. The root system is now large enough to support rapid shoot growth. You will notice the stem extending upward. This is the time to ensure your pot has adequate drainage. The roots are hungry for oxygen. Soggy soil at this stage can suffocate the new growth.
By day 180, the cutting is a established plant. It has a dense root ball and multiple active shoots. It is ready for the next phase: trellis training. Do not rush this step. A plant with a weak root system will struggle to support the weight of mature stems. Let the roots do their work first.
Step 5: Water Like the Cutting Is Already Dead
Your new cutting is a water tank, not a plant. It has no roots to pull moisture from the soil, so it relies entirely on the reserves stored in its thick, fleshy cladode. Until those roots form, your job is to keep the medium barely moist, never soggy. Over-irrigation is the fastest way to kill a dragon fruit cutting.
Dragon fruit is a cactus, but it is not a desert survivor in the way you might think. While it tolerates dry spells, it has a fairly high water requirement once established. However, excessive soil moisture is a death sentence for a rootless stem. UF/IFAS notes that over-watering on a timer is a named cause of decline and root rot.[1] The same logic applies to your pot. If you water on a schedule, you are guessing. If you water when the soil is wet, you are drowning the tissue.
Check the soil with your finger rather than the calendar; if the top inch feels damp, walk away, but if it is dry, give the cutting a small drink. This tactile check prevents the two most common killers of cuttings: Phytophthora and Fusarium. A major review of pitaya cultivation confirms that dragon fruit is extremely sensitive to waterlogging. Over-irrigation or poor drainage sharply raises the risk of these fungal diseases, which can also cause flower-bud and young-fruit drop later in the plant’s life.[2]
California growers have a different perspective that reinforces the same rule. UC Cooperative Extension reports that in dry climates, pitaya can often be grown without fungicides, but plants given too much water become susceptible to root rot caused by several fungi.[5] In California, root and collar rots are likely caused by Phytophthora or Pythium. A plant with poor roots shows its distress early through stalled growth, extra sunburn, and smaller fruit.[5] For your cutting, stalled growth is the first sign you have been too generous with the watering can.
Soft rots of stems and blades are caused by bacteria like Xanthomonas campestris and Erwinia carotovora. These pathogens thrive in wet, anaerobic conditions. If your pot sits in a saucer of standing water, you are creating a breeding ground for rot. Ensure your container has drainage holes and never let the pot sit in water.
Once the cutting establishes roots, the rules change. You will want to shift toward moderate, consistent moisture. The same review recommends drip irrigation with mulch to achieve this balance, holding moisture steady without waterlogging the root zone.[2] But for now, patience is your best tool. Let the cutting use its own stored water. If you must water, do it sparingly. A dry pot is a safe pot. A wet pot is a gamble. For more on how this variety behaves once it is established, see our blog/vietnamese white variety spotlight.
DIAGRAM: Anatomy of a correctly planted cutting
Visualizing the setup prevents the most common errors in the first month. Imagine a cross-section of your pot. At the very bottom sits a layer of coarse drainage material, topped by a fast-draining sand or perlite mix. The cutting stands vertically in the center, its basal end buried just 1 to 2 inches deep[2]. This shallow burial is critical. It anchors the stem without smothering the callused wound, allowing the base to breathe while it generates roots.
A slanted cut at the bottom exposes more vascular tissue for root initiation. Above the soil line, the green cladode rises straight up. A single, sturdy stake stands beside it, tied loosely with soft twine or a plant tie. This support is non-negotiable. Dragon fruit is a hemi-epiphytic climber that relies on aerial roots to grip surfaces, but a young cutting has not yet developed those lignified attachment points[7]. Without a stake, the weight of new growth can snap the tender base or tilt the cutting, disrupting root formation.
Look closely at the top of the cutting. You will see a small notch or mark indicating the original orientation. This ensures the basal end (the cut you made) is down and the apical end (the growing tip) is up. Planting it upside down will not kill it immediately, but it will confuse the plant’s natural hormone flow and delay rooting. The goal is to keep the plant’s energy focused upward.
As the cutting establishes, it may push out multiple shoots. Resist the urge to let them all grow. In the first months, remove all lateral shoots and keep only the most upright apical one[2]. This single leader directs all carbohydrate reserves toward vertical extension, helping the plant reach the trellis faster. Multiple branches at this stage compete for resources, resulting in weaker stems and slower overall progress.
Check the tie. As the stem thickens, loosen the tie to prevent it from cutting into the cladode. A tight tie can restrict vascular flow and invite rot, especially if moisture gets trapped against the bark.
Feeding the First Season
The biggest mistake new growers make with a fresh Vietnamese white cutting is feeding it too soon. Your new clone has no functional root system yet. It is running on stored carbohydrates in the stem, not drawing nutrients from the soil. Adding fertilizer now does not help the plant grow; it simply sits in the potting mix, accumulating salts that burn the shallow, fragile roots as they finally begin to emerge. Feeding too early is the most common mistake.
Hold off on all fertilizer for about a month after planting, or wait until you see clear signs of new growth. That first green shoot is your signal that the root system is active and capable of uptake. Once that happens, start with small, frequent doses. A balanced granular fertilizer with an analysis like 6-6-6, 8-3-9, or 8-4-12 works well. Apply a quarter pound per plant every two months. This light, consistent feeding supports steady vegetative growth without overwhelming the young root zone.[1]
As the plant matures, its appetite increases. In years two and three, scale up the application rate to 0.3 to 0.4 pounds per plant per feeding, maintaining the same two-month interval. The goal is to match the fertilizer input to the plant’s expanding canopy and root mass. A mature vine on a trellis supports hundreds of pounds of stem weight, and that biomass requires significantly more nutrition than a single cutting in a nursery pot.
Watch for salt buildup. If you see white crust on the soil surface or browning at the tips of new cladodes, flush the pot with plain water. Dragon fruit roots are shallow and sensitive to high electrical conductivity. When in doubt, under-feed. You can always add more fertilizer later, but you cannot undo root burn.
| Plant Age | Fertilizer Type | Rate per Plant | Frequency |
|---|---|---|---|
| Year 1 (after new growth) | Balanced granular (6-6-6, 8-3-9, 8-4-12) | 0.25 lb | Every 2 months |
| Years 2-3 | Balanced granular | 0.3-0.4 lb | Every 2 months |
For more details on how this feeding schedule supports fruit quality in the blog/vietnamese white variety, see our variety spotlight.
Warm Season, Cool Season: When You Plant Matters
Timing your planting is not just about convenience; it dictates how quickly your cutting establishes. Dragon fruit thrives in a specific temperature window, with optimal growth occurring between 65 and 77 F.[1] While the plant can tolerate a range of climates, it stops performing useful work when temperatures exceed roughly 100 F.[1] On the other end of the spectrum, exposure to freezing temperatures below 31 F for a long duration causes damage, though the plant often recovers rapidly from light, brief freezes.[1]
The season you choose to plant directly impacts root development. Warmth drives cell division in the root meristem, meaning spring and summer cuttings root significantly faster and more robustly than those planted in the cold.[2] Cool conditions slow this biological process to a crawl. If you acquire a cutting in autumn, do not force it into cold, wet media immediately. It is far safer to hold the cutting in a dry pot until spring arrives.[2]
A common misconception is that a winter-killed cutting died from the cold alone. In reality, a winter-stalled or dead cutting is usually the victim of a wet-and-cold combination. Cold soil slows evaporation and root uptake, leading to waterlogging that rots the base before the plant can even begin to establish. Patience pays off here. Waiting for the soil to warm up ensures that the energy your cutting uses goes toward building roots, not just surviving a hostile, soggy environment.
Pro Tip: If you are in a region with mild winters, you can plant in late autumn, but ensure the site has excellent drainage and protection from frost. If you are in a zone with hard freezes, wait until the threat of frost has passed and the soil has warmed.
Moving to the Trellis
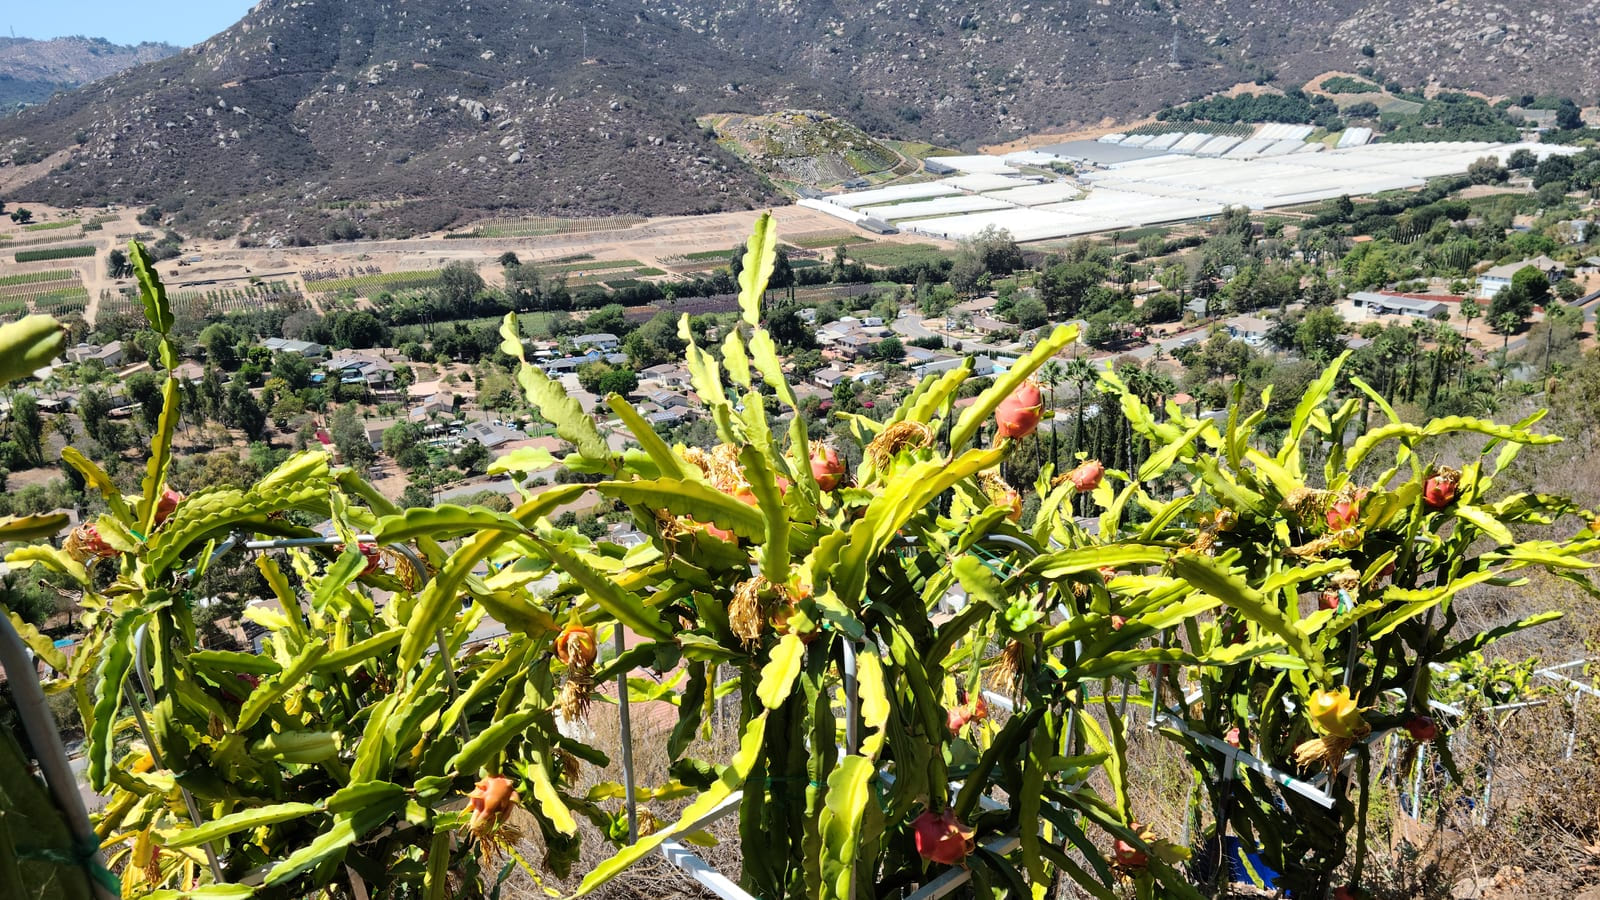
Your cutting has spent 4 to 6 months building a root system in its pot. Now it needs a permanent home. This is not a decorative garden feature. A mature dragon fruit vine is a heavy, sprawling organism. UF/IFAS warns that the structure must withstand several hundred pounds of stem weight.[1] If you build it cheap, it will buckle. If you build it weak, it will collapse.
Location matters as much as construction. Set your post 15 to 25 feet clear of trees, power lines, and other structures.[1] This distance prevents competition for light and keeps the vine from tangling in overhead wires. It also gives you room to walk around the plant for pruning and harvest. Planting right next to a house wall is a mistake. A mature vine is too heavy and sprawling to manage against a vertical surface without damaging the siding or the plant.
The standard setup is a single sturdy post at least 6 feet tall.[1] The top must support a grid or crossbar that allows the stems to drape over. Do not use bare wire for the top support. Dragon fruit stems are succulent and soft. Bare wire cuts into them, creating entry points for rot and disrupting nutrient flow.[1] If you must use wire, sleeve it in plastic garden hose. A better option is a wooden or metal top grid that distributes the weight evenly.
Check your anchor. Before you transplant, test your trellis. Hang a heavy bag or bucket from the top support. If the post leans or the grid flexes, reinforce it now. A vine that has been climbing for a year will not forgive a weak foundation.
Once the structure is solid, dig a hole for the pot. Keep the root ball intact. Set the plant in the ground so the top of the root ball is level with the soil surface. Backfill with native soil mixed with compost. Water deeply to settle the roots. Tie the main stem gently to the post using soft twine or plant tape. Do not pull it tight. The plant will grow upward on its own, using the post for support while it develops its own aerial roots.
When It Fruits, and What Actually Gates Flowering
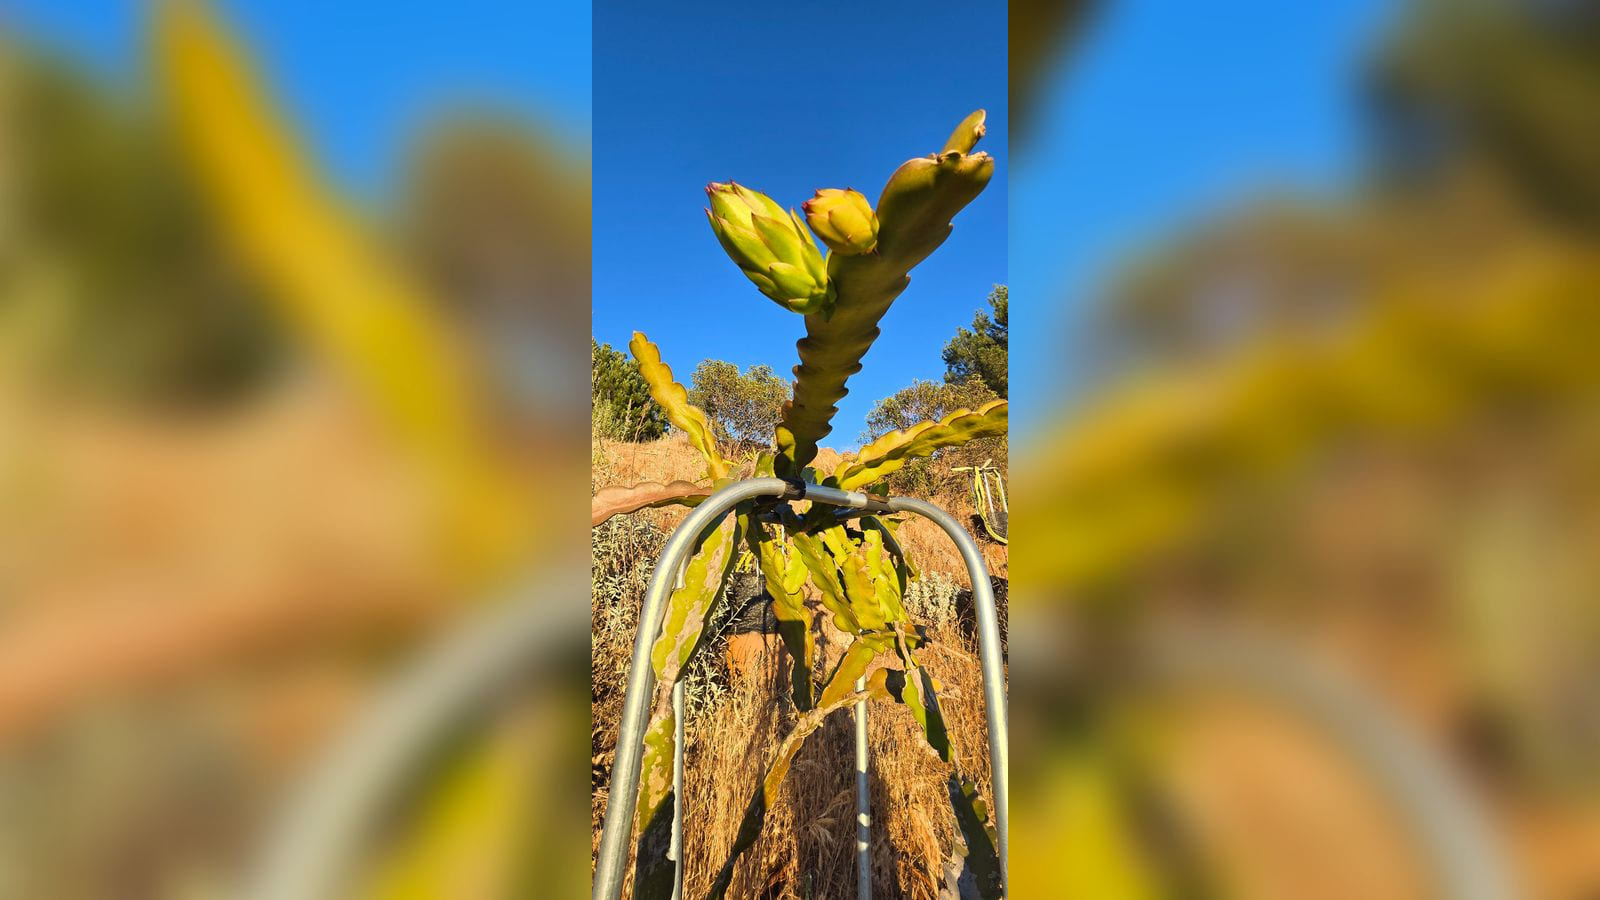
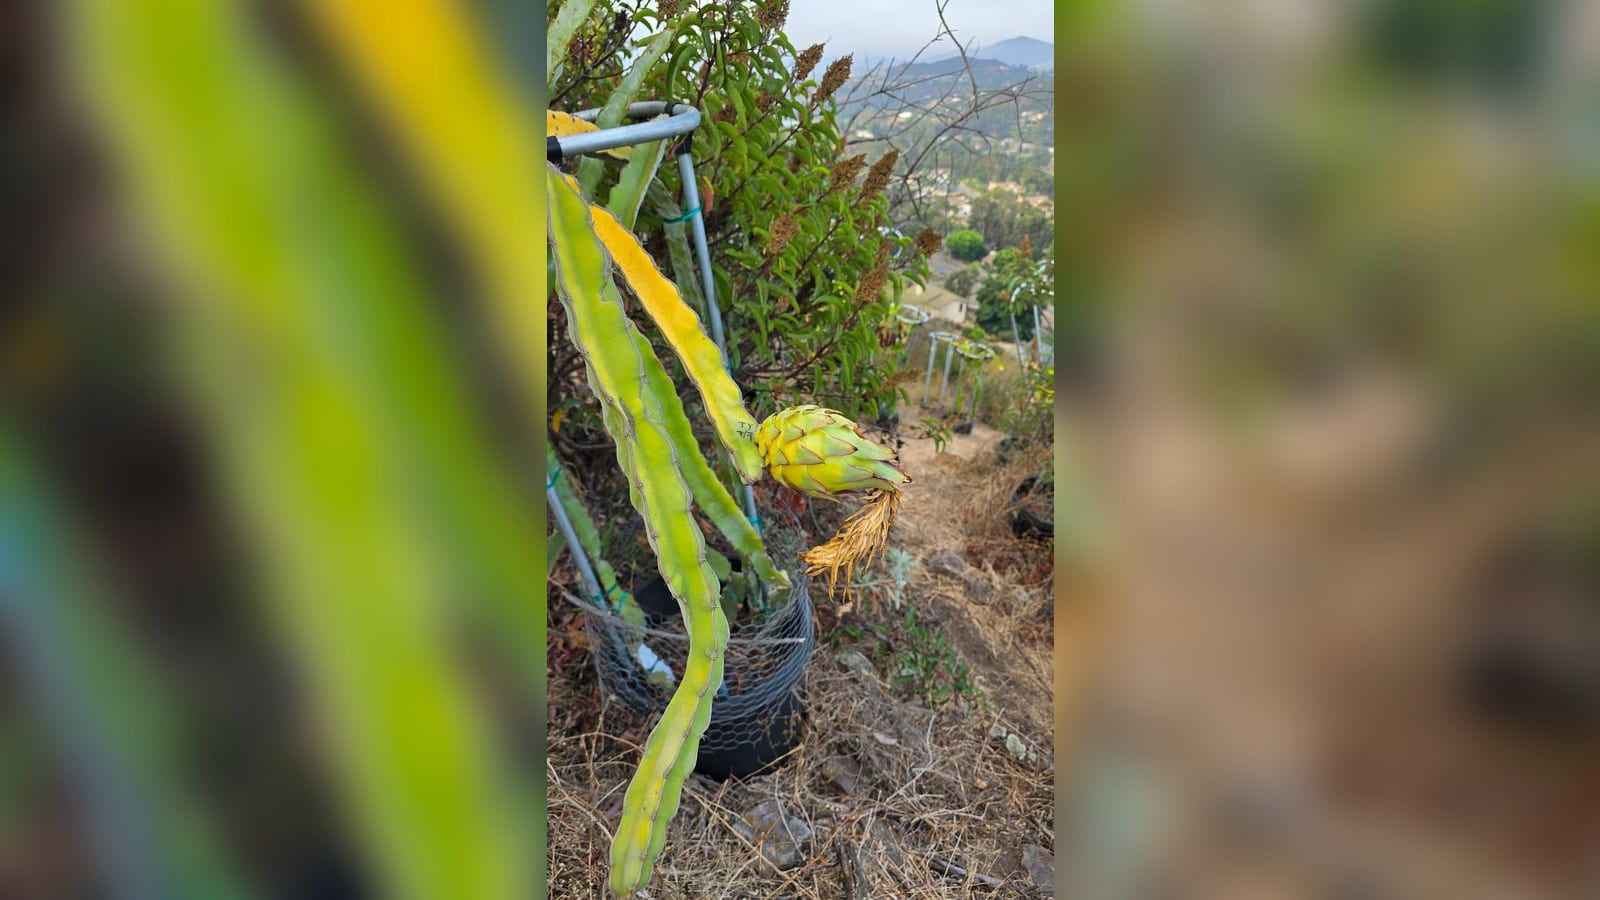
You have rooted the cutting and moved it to a trellis. Now you wait. The timeline for your first real crop depends on how you manage the plant’s energy. Florida extension data shows that fruit can appear as early as 6 to 9 months after planting a long cutting[1]. In commercial systems, cuttings often crop in under a year because growers prioritize early production over long-term structure. You get to choose which path you take, but understanding the triggers helps you manage either outcome.
Flowering is not random. It is gated by specific environmental conditions. The plant needs to switch from vegetative growth to reproductive mode, and this switch requires warmth and light. Night temperatures must consistently stay above 59 F (15 C) to trigger floral induction[2]. If nights are cooler, the plant stays in growth mode. On the other end of the spectrum, sustained daytime heat above 100 F (38 C) inhibits induction and can abort buds that have already formed[2]. Your local climate sets the baseline, but microclimate management can help you stay in the sweet spot.
Light is the second critical lever. A daily light integral near 12 mol PAR per square metre per day supports commercially viable yields[2]. This sounds technical, but it translates to full sun exposure for most of the day. While about 30% shade is recommended for the first 3 to 4 months after planting to prevent stem burn in intense sunlight, too much shade later reduces production and fruit quality[1]. Once the plant is established, remove the shade cloth. The cladodes need to build carbohydrate reserves, which supply the energy for the switch from growth to flowering[2]. Without sufficient light, the plant lacks the fuel to produce flowers, let alone fruit.
The Two Ways Home Growers Stall Flowering
Most failures to fruit are not due to bad genetics or age. They are due to two common mistakes: excessive shade and over-watering. If your vine is under a tree or a roof overhang, it may never reach the light integral needed for induction. Move it to full sun once it is established. Second, over-watering causes stress that diverts energy away from flowering. While dragon fruit needs water, excessive soil moisture causes root issues that stall the plant. Let the top inch of soil dry out between waterings. A stressed plant will drop buds or fail to set them entirely.
Carbohydrate reserves in the cladodes are the battery for this process. A thin, weak vine cannot support fruit because it lacks the stored energy to sustain the development of the flower and the subsequent fruit. This is why we recommend building a strong frame in the first 2 to 3 years. A robust plant with thick, green cladodes has the reserves to handle the energy demand of flowering. If you see buds forming but dropping, check your light levels and water management first. Then, consider if the plant is simply too young to support the load. Patience and proper light are the most reliable tools for getting your first crop.
One Plant or Two: The Pollination Question
On our farm, we grow and sell Vietnamese White as a self-fertile variety. You can plant a single clone and expect it to set fruit on its own.
However, the broader dragon fruit trade is messy. The University of Florida IFAS Extension warns that cultivar self-compatibility is poorly documented across the industry.[1] Self-incompatibility has been reported in several cultivars sold by nurseries, meaning some plants labeled as self-pollinating may actually require a partner to produce a crop.[1]
Because of this uncertainty, UF/IFAS recommends planting two or three different genetic types to ensure reliable fruit set.[1] If you only have space for one plant, or if your Vietnamese White fails to set fruit despite healthy flowering, hand pollination is the necessary backup. You must transfer pollen manually at night or in the very early morning when the flowers are open.[1]
For those interested in the specific flavor profile and parentage details that make this variety worth the extra effort, see our full blog/vietnamese white variety spotlight.
DIAGRAM: Cutting trouble, symptom to cause
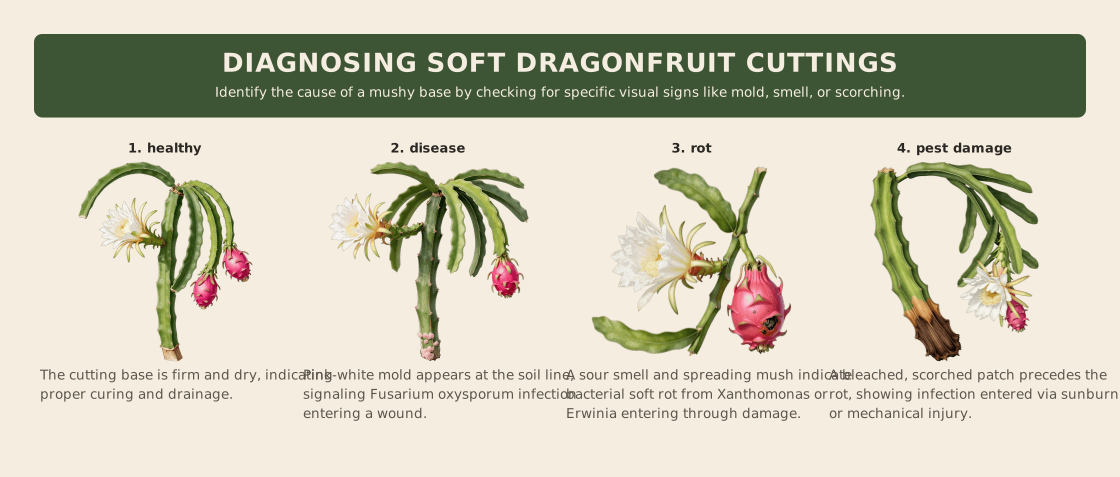
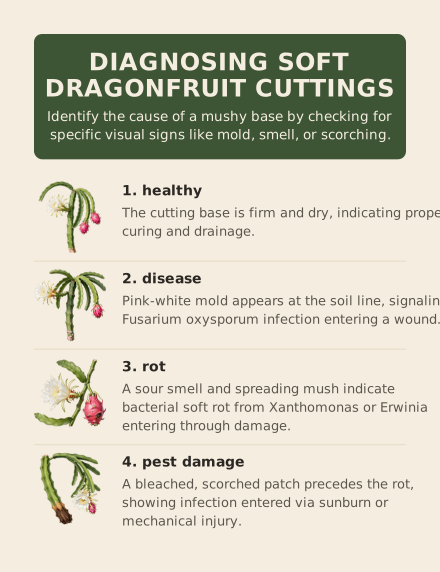
When a cutting fails, the visual evidence often points to multiple potential culprits. Diagnosing the problem requires looking at the whole picture, not just the obvious symptom. Two common clusters of failure illustrate how different causes can produce similar-looking distress.
Cluster 1: The Mushy, Collapsing Base
A soft, wet, or collapsing base is the most frequent complaint. While it looks like simple rot, the underlying cause can vary significantly.
| Symptom | Potential Cause | Why It Happens |
|---|---|---|
| Mushy, blackened base | Uncured wound | Planting before the cut healed leaves an open door for pathogens. |
| Wet, foul-smelling decay | Waterlogging | Dragonfruit stems are highly sensitive to excess moisture, which suffocates roots and invites fungi.[2] |
| Rot starting at soil line | Fusarium oxysporum | This fungus causes basal rot, which can enter through wounds or even undamaged tissue, moving upward from the base.[6] |
| Soft, watery lesions | Xanthomonas campestris | Bacterial soft rot often enters through fresh cuts or insect damage, spreading quickly in wet conditions. |
| Stalled, soft growth | Buried too deep | Burying more than 2 inches of stem traps moisture against the tissue, preventing proper aeration and healing. |
Cluster 2: Pale, Soft, or Etolated Growth
Instead of rotting, some cuttings grow weak, pale, and stretched. This indicates the plant is struggling to produce energy or is being starved of light.
| Symptom | Potential Cause | Why It Happens |
|---|---|---|
| Long, thin, pale stems | Etolation | The cutting is stretching desperately to find light, resulting in weak structural tissue. |
| Yellowing, limp cladodes | Too much shade | While young cuttings need some protection, excessive shade reduces vigor and delays establishment.[1] |
| Burned tips, stunted growth | Salt buildup | Over-fertilizing or poor drainage can accumulate salts, damaging the sensitive root zone and causing tissue burn.[5] |
Identifying the specific cause helps you adjust your care routine. If the base is mushy, check your watering habits and planting depth first. If the growth is pale and stretched, move the pot to a brighter location with filtered light. For more details on what healthy growth should look like, see our blog/vietnamese white variety spotlight.
Why Your Cutting Fails: The Short List
Even with a clean clone and proper curing, things go wrong. The table below maps the most common failure modes to their underlying causes and the fixes that matter. If you spot a symptom early, you can often save the piece. If the damage is systemic, you might not.
| Symptom | Cause | Fix | Can You Save It? |
|---|---|---|---|
| Mushy, black base | Waterlogging invites Phytophthora or Fusarium into the wound or soil line.[2][6] | Stop watering. Lift the cutting, trim away rot until you hit healthy white tissue, re-cure for a few days, and replant in fresh, dry media. | Yes, if the rot hasn’t traveled more than an inch up the stem. |
| Shrivelling and wrinkling | Roots failed to form, so the stem is consuming its own stored water and carbohydrates.[7] | Check for root initiation. If none, remove the cutting, trim the basal end to fresh tissue, re-cure, and replant in a slightly moister (but not wet) mix. | Maybe. If the stem is still firm, it has reserves left. If it’s hollow or papery, it’s done. |
| If no growth after several weeks in cool weather | Media was too cold or too wet, slowing cell division in the root meristem.[2] | Move the pot to a warmer spot (65-77 F) and ensure the top inch of media dries between waterings. Patience is key; warmth drives the switch. | Yes. The cutting is dormant, not dead. It will wake up when conditions improve. |
| Pale, stretching growth | Insufficient light. The cutting is reaching for sun, depleting reserves without building strength. | Move to a brighter location, but keep about 30% shade to prevent sunburn. Ensure the pot isn’t crowded by other plants. | Yes. The new growth will harden off and darken once light levels are correct. |
| Tip rot | Bacterial soft rot (Xanthomonas or Erwinia) entering through a wound or stress point.[5] | Cut the affected tip off well below the rot. Seal the new cut with cinnamon or Bordeaux paste. Keep the wound dry for a week. | Yes, if you act fast. The bacteria move slowly; a clean cut stops the spread. |
| Sunken, bleached patch | Sunburn. As a CAM plant, dragonfruit closes stomata during the day. If roots are damaged or the plant is drought-stressed, it can’t cool itself, and the tissue scorches.[5] | Provide immediate shade. Check root health. If roots are intact, the patch will scar over but not spread. If roots are gone, the whole plant is at risk. | Yes, if the rest of the stem is green and firm. The scar will remain, but the plant will recover. |
| If a shoot appears but the plant collapses | False start. The cutting used stored energy to push a shoot, but roots never formed. The shoot then draws down the last reserves and fails. | Check the base. If no roots, trim the shoot back to reduce demand, re-cure, and replant. Consider using a rooting hormone next time to speed root initiation. | Maybe. If the stem is still plump, it can try again. If it’s shriveled, it’s too late. |
Don’t ignore the base. Most failures start at the soil line. If you see any softening or discoloration there, act immediately. Waiting even a few days can turn a saveable cutting into a compost pile.
DIAGRAM: Water it or wait
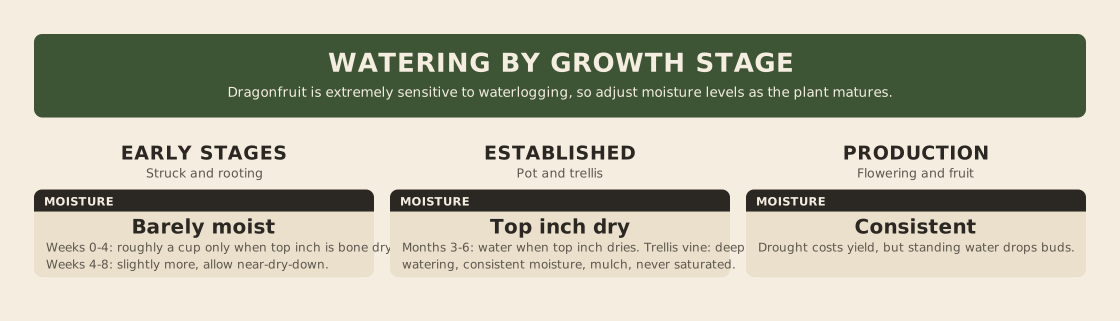
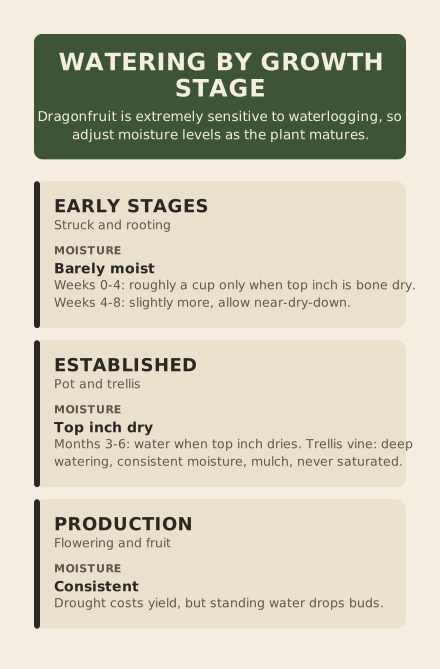
Watering a dragon fruit cutting is not about following a calendar. It is about matching moisture to root volume. A fresh cutting has no roots to drink, so it relies on stored water in the stem. As roots emerge and expand, the plant’s thirst increases. The one rule that never changes is that the media must be free-draining. Soggy soil kills more cuttings than drought does.
| Growth Stage | Water Amount | Interval | Goal |
|---|---|---|---|
| Struck Cutting (Weeks 0-4) |
Minimal. Just enough to moisten the top inch. | Only when dry to touch. | Prevent rot while callus forms. |
| First Roots (Weeks 4-8) |
Light. Water the base, not the whole pot. | Only when dry to touch. | Encourage root spread without drowning. |
| Established Pot (Months 3-6) |
Moderate. Water until it drains freely. | Only when dry to touch. | Support rapid shoot growth. |
| Trellis Vine | Heavy. Soak the root zone thoroughly. | Only when dry to touch. | Hydrate large biomass. |
| Flowering Vine | Consistent. Never let it dry out completely. | Only when dry to touch. | Prevent bud drop. |
The Sunburn Signal: Dragon fruit is a CAM plant, meaning its stomata stay closed during the day to save water. If a vine is drought-stressed or has damaged roots, it cannot cool itself in full sun. The first sign of trouble is often bleached or scorched cladodes, not wilting. If you see sunburn on an established plant, check the roots immediately. It usually means the plant is thirsty or the soil is waterlogged, preventing uptake.
As the plant matures, its water needs rise sharply. A young cutting in a small pot might need a cup of water once a week. A mature vine on a trellis can drink several gallons in a hot week. The transition is gradual. Start with caution. It is easier to add water later than to save a rotted stem. Always ensure excess water drains away quickly. Standing water is the enemy of every stage of growth.
Buying a Cutting: What to Demand From a Seller
You have the biology down. Now you need the right piece of plant material to put in the ground. A cutting is a clone, which means it carries the exact genetic code of the mother plant, but it also carries whatever pathogens were living on that mother plant. This is the single biggest risk in buying a dragon fruit cutting. Informal exchange of uncertified cuttings is a known vector for spreading disease between farms and vine blocks.[2] A cheap piece of stem from an unknown source can introduce fungal issues that stall your garden for years.
Ask the seller about their mother plants. You want a nursery that screens its stock and disinfects tools between cuts. If they cannot tell you where the cutting came from or how they manage disease pressure, walk away. You are buying a living organism, not a decorative branch.
Next, look at the stem itself. Ignore the bright, pale green shoots at the top of the vine. Those are young and often lack the carbohydrate reserves needed to push out roots before they exhaust themselves. You want a mature segment. Look for dark green tissue that feels structurally tough. Basal cladodes, the segments closest to the ground, root more reliably because they hold a better balance of auxins and stored reserves.[2] If the piece is less than a year old, it will likely struggle to establish.
Size matters for vigor. Longer cuttings carry a higher carbon-to-nitrogen ratio and more carbohydrate reserve, which translates to faster root development and quicker trellis reach. A short, thin piece will survive, but it will take longer to become a productive plant.
Check the cut. The best cuttings are severed at the cladode insertion, the point where the woody tissue joins the mother plant.[2] This clean break preserves the natural vascular connection and minimizes damage to the living tissue. If the seller cut into the succulent blade itself, the rooting results will be less consistent. You should see a visible, callused wound. If the cut is fresh, wet, or oozing, the seller did not cure it properly. A fresh wound is an open door for pathogens like Fusarium, which can enter undamaged tissue but accelerates through wounds.[6]
Finally, demand a name. Do not buy based on a color photo of the fruit. Dragon fruit varieties are complex, and self-incompatibility is common in many cultivars sold by nurseries.[1] You need to know exactly what you are planting so you can plan for pollination partners. Ask for the specific variety name and verify it against a reputable source. If the seller cannot provide a verifiable name, you are gambling on the genetics. For our own stock, we provide full provenance and variety details, so you know exactly what you are getting. See our blog/vietnamese white variety spotlight for more on what to expect from a clean clone.
Key Takeaways
Here is the condensed timeline and care logic for your new clone. These numbers are your baseline for success.
Water the young plant as if it were a cactus, keeping the soil barely moist to avoid fungal issues, but feed it as if it were a vigorous vine. Once the roots are established, frequent light applications of balanced fertilizer drive the rapid shoot extension needed to reach your trellis.[1]
References
- Pitaya (Dragonfruit) Growing in the Florida Home Landscape (HS303), UF/IFAS Extension (Crane, Balerdi, Majid) (2016).
- Pitaya as a New Alternative Crop for Iberian Peninsula: Cultural Practices, Plants (MDPI), Universidade do Algarve / UF Tropical Research and Education Center (2026).
- Screening of Plant Growth Regulators for Promoting Rooting of Pitaya Cuttings, Plants (MDPI), Hainan University (2026).
- Influence of root inducers and substrates on the vegetative propagation of pitahaya species (Hylocereus spp.) under nursery conditions, Scientific Reports, Instituto Nacional de Innovación Agraria (Peru) (2026).
- Pitahaya Diseases (Downer, adapted from Bender), UC Agriculture and Natural Resources / UC Cooperative Extension (2016).
- Basal Rot of Hylocereus undatus Caused by Fusarium oxysporum in Buenos Aires, Argentina, Plant Disease 91(3):323 (2007).
- Anatomical and Biomechanical Properties of the Junction between Stem and Aerial Roots of Selenicereus undatus, Plants (MDPI), Technische Universität Dresden (2023).